Bissell PowerSteamer PowerBrush Instruction Manual: A Comprehensive Guide
This manual, sourced from manualsbase and dating back to 2020-08-17, provides detailed English instructions for the Bissell PowerBrush 1622, ensuring optimal cleaning performance.
Welcome to the world of effortless cleaning with your Bissell PowerSteamer PowerBrush! This innovative appliance combines the power of steam with a rotating brush to deliver a deep and hygienic clean on a variety of surfaces. This manual serves as your comprehensive guide to understanding, operating, and maintaining your model – specifically the 1622 and similar variations.
The PowerSteamer PowerBrush is designed to tackle tough messes, from sticky floors to grimy upholstery, utilizing only the natural cleaning power of steam. Forget harsh chemicals and embrace a healthier, more eco-friendly approach to home cleaning. This guide, sourced from manualsbase, will walk you through each step, ensuring you maximize the potential of your new cleaning companion. Prepare to experience a new level of clean!
Understanding Your Model: 1622 & Similar
Your Bissell PowerSteamer PowerBrush, particularly model 1622 as referenced in manualsbase, is a versatile steam cleaning system. While this guide focuses on the 1622, the core functionality and many components are shared across similar Bissell PowerSteamer models. Key features include a powerful steam generator, a rotating PowerBrush roller for enhanced scrubbing action, and various attachments for specialized cleaning tasks.
Familiarize yourself with the appliance’s components – the water tank, steam trigger, handle, and brush head. Understanding these elements is crucial for effective operation and maintenance. The size of the unit is approximately 8.6MB in digital format, indicating a detailed user manual is available. This guide will help you navigate these features and unlock the full cleaning potential of your Bissell PowerSteamer.
Safety Precautions & Important Warnings
Before operating your Bissell PowerSteamer PowerBrush, carefully review these safety guidelines. Always unplug the unit when not in use and before performing maintenance. Never direct steam towards people or pets – severe burns can occur. Use caution on stairs and avoid operating in areas with flammable liquids or gases.
Ensure the water tank is filled with the appropriate water type (see filling instructions) to prevent damage and ensure optimal performance. Do not operate the unit if the cord or plug is damaged. This appliance is for indoor use only. Keep children and unauthorized personnel away during operation. Refer to the complete manual (available as an 8.6MB file on manualsbase) for a comprehensive list of warnings and safety instructions to ensure safe and effective cleaning.

Setting Up Your Bissell PowerSteamer PowerBrush
Proper setup, detailed in the manualsbase resource, involves unboxing components, assembling the PowerBrush, and correctly filling the water tank for effective steam cleaning.
Unboxing and Component Identification
Upon opening your Bissell PowerSteamer PowerBrush (model 1622 or similar, as referenced in manualsbase documentation), carefully remove all packaging materials. A thorough inventory is crucial to ensure all components are present before proceeding. You should find the main PowerSteamer body, the PowerBrush attachment itself, the water tank, various nozzles and attachments (including potentially an extension wand and hose – check your specific model’s contents), and this instruction manual.
Inspect each item for any visible damage incurred during shipping. Pay close attention to the PowerBrush roller and ensure it’s securely attached. The water tank should be clean and free of debris. Familiarize yourself with the location of the power cord and any quick-start guides included. Refer to the diagrams within the manual (available via manualsbase) to correctly identify each part and understand its function. Retain the original packaging for potential future storage or returns.
Assembling the PowerBrush – Step-by-Step
Begin by securely attaching the PowerBrush head to the main PowerSteamer body. Align the connection points, ensuring a firm ‘click’ to confirm proper engagement – consult the diagrams in your manual (sourced from manualsbase). Next, verify the PowerBrush roller spins freely. If not, gently check for any obstructions.
For optimal performance, ensure the brush bristles are clean and undamaged; Depending on your model, you may need to attach additional accessories like the specialized cleaning nozzles or the extension wand after the PowerBrush head is connected. Always refer to the detailed illustrations within the Bissell documentation for precise assembly instructions. Incorrect assembly can impact cleaning effectiveness and potentially damage the unit. Double-check all connections before filling the water tank and powering on.
Filling the Water Tank – Proper Water Types
The Bissell PowerSteamer PowerBrush requires careful attention to water type for optimal performance and longevity; Always use distilled or demineralized water to prevent mineral buildup within the heating chamber – a common issue addressed in maintenance guides (manualsbase). Tap water contains minerals that can cause scaling, reducing steam output and potentially damaging the unit.
Never use scented oils, vinegar, or other cleaning agents directly in the water tank, as these can corrode internal components. Bissell recommends their specialized cleaning solutions, added after filling with appropriate water. Ensure the tank is not overfilled; adhere to the maximum fill line indicated on the tank itself. Using the correct water type significantly extends the lifespan of your PowerSteamer and maintains consistent cleaning power.
Operating Instructions: Core Functionality
This section details powering on, selecting cleaning modes, utilizing the PowerBrush attachment, and mastering the steam trigger for effective and efficient cleaning operations.
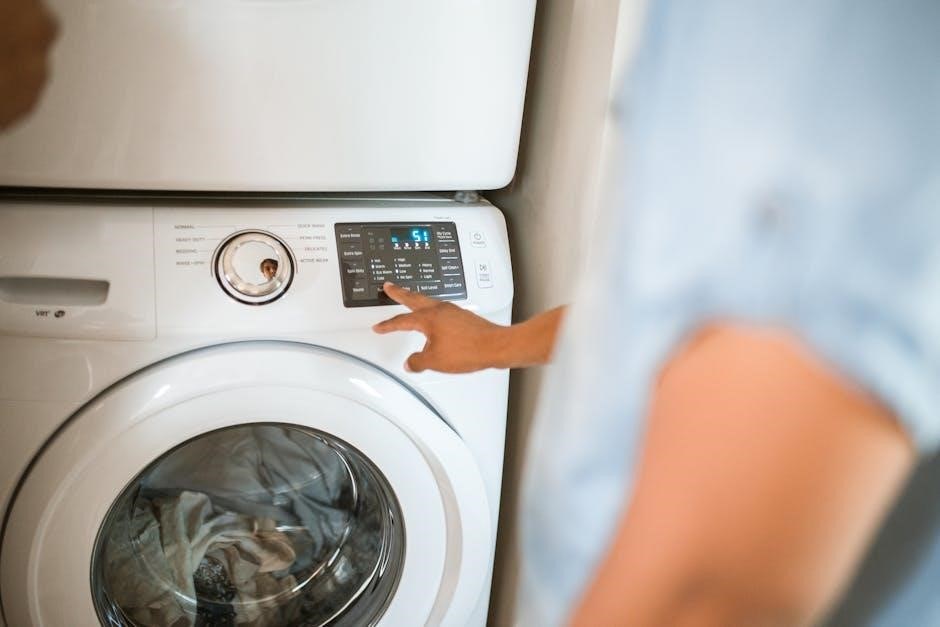
Powering On and Selecting Cleaning Modes
To begin operation, ensure the unit is properly assembled and the water tank is filled with the appropriate water type, avoiding mineral buildup. Plug the PowerSteamer into a grounded electrical outlet. The power button, typically illuminated, initiates the heating process; allow sufficient time for the unit to reach operating temperature – indicated by a ready light.
The Bissell PowerSteamer PowerBrush offers various cleaning modes tailored to different surfaces. A ‘Low’ setting conserves water and is suitable for delicate surfaces, while ‘High’ provides maximum steam output for stubborn stains. Some models feature a ‘Turbo’ or ‘Deep Clean’ mode for heavily soiled areas. Select the desired mode using the mode selector dial or buttons, referencing the surface-specific recommendations in the ‘Cleaning Different Surfaces Effectively’ section. Always test in an inconspicuous area first.
Using the PowerBrush Attachment
The PowerBrush attachment is central to the Bissell PowerSteamer’s effectiveness, particularly on carpets and rugs. Securely attach the PowerBrush to the main unit, ensuring a firm click to prevent detachment during operation. The rotating brush roll agitates fibers, loosening dirt and grime before steam penetration.
When using on carpets, employ slow, overlapping passes for optimal results. For heavily soiled areas, pre-treat with a Bissell cleaning solution. On hard floors, the PowerBrush can gently scrub surfaces, but avoid prolonged use on delicate wood finishes. Regularly inspect the brush roll for debris and obstructions, cleaning as detailed in the ‘Maintenance & Troubleshooting’ section. Proper PowerBrush usage maximizes cleaning power and extends the life of your floors.
Steam Trigger & Control Settings
The Bissell PowerSteamer’s steam trigger initiates and controls steam output. A gentle squeeze delivers a consistent steam flow, while releasing the trigger immediately stops it – crucial for delicate surfaces. Many models feature adjustable control settings, typically labeled ‘Low,’ ‘Medium,’ and ‘High.’
‘Low’ is ideal for sensitive fabrics and light cleaning, minimizing moisture. ‘Medium’ suits most everyday cleaning tasks on floors and upholstery. ‘High’ provides maximum steam for stubborn stains and deep cleaning, but use cautiously to avoid damage. Always test a hidden area first. Understanding these settings ensures effective cleaning without risking material harm. Consistent trigger pressure maintains steady steam, enhancing cleaning performance.

Cleaning Different Surfaces Effectively
This section details how to adapt the Bissell PowerSteamer for optimal results on various surfaces, including hard floors, carpets, and upholstery materials.
Hard Floor Cleaning – Tile, Laminate, Wood
Achieving sparkling clean hard floors with your Bissell PowerSteamer PowerBrush is straightforward. Begin by ensuring the PowerBrush roller is attached and functioning correctly. For tile and laminate, utilize a lower steam setting to prevent potential damage from excessive moisture. A gentle sweeping motion is ideal; avoid prolonged exposure in one area.
When cleaning sealed hardwood floors, exercise extra caution. Always test a small, inconspicuous area first to confirm compatibility and prevent warping or discoloration. Use the lowest steam setting and a microfiber cloth attachment for optimal results. Avoid using the PowerBrush roller directly on wood, as it could cause scratches. Regularly inspect the floor for any signs of moisture buildup and adjust the steam level accordingly. Proper technique ensures a safe and effective clean.
Carpet & Rug Cleaning – Low Pile vs. High Pile
The Bissell PowerSteamer PowerBrush excels at revitalizing carpets and rugs, but technique varies based on pile height. For low-pile carpets, a standard steam setting and the PowerBrush roller engaged provide excellent cleaning. Employ slow, overlapping passes to lift dirt and grime effectively. Regularly check the roller for debris accumulation and clear as needed.
High-pile carpets require a different approach. Utilize a higher steam setting for deeper penetration, but avoid over-saturation. Consider disengaging the PowerBrush roller or using a lower speed to prevent tangling. Multiple passes may be necessary to achieve desired results. Always allow ample drying time to prevent mildew growth. For delicate rugs, test a hidden area first and use the gentlest setting available. Proper adjustment ensures optimal cleaning without damage.
Upholstery Cleaning – Sofas, Chairs, & More
The Bissell PowerSteamer PowerBrush is remarkably versatile for upholstery cleaning, breathing new life into sofas, chairs, and other fabric furnishings. Begin by identifying the fabric type; always test in an inconspicuous area first to ensure colorfastness. Utilize the appropriate attachment – often a smaller nozzle or brush – for targeted cleaning.
Employ a lower steam setting for delicate fabrics like silk or velvet, and a higher setting for durable materials like microfiber. Use gentle, sweeping motions, avoiding excessive saturation. Pay close attention to seams and crevices where dirt accumulates. Allow upholstery to air dry completely, avoiding direct sunlight or heat. Regular upholstery cleaning extends the life of your furniture and maintains a fresh, inviting home environment. Remember to vacuum before steaming!

Maintenance & Troubleshooting
Consistent upkeep, including tank cleaning and descaling, ensures peak performance. Addressing issues like heating or steam output promptly extends the PowerSteamer’s lifespan.
Emptying and Cleaning the Water Tank
Regularly emptying and cleaning the water tank is crucial for maintaining your Bissell PowerSteamer PowerBrush’s performance and preventing unpleasant odors. Always ensure the unit is unplugged and completely cooled before beginning this process. Gently remove the water tank from the main body of the steamer, being careful not to spill any remaining water.
Dispose of any leftover water responsibly. To clean the tank, use a mild dish soap and warm water, rinsing thoroughly until no soap residue remains. Inspect the tank for any mineral buildup or debris; a soft brush can help dislodge stubborn particles. Pay particular attention to the tank’s opening and any internal components.
Allow the tank to air dry completely before reattaching it to the PowerSteamer. A clean water tank contributes significantly to the longevity and efficiency of your cleaning appliance, ensuring consistently fresh steam for effective sanitization.
Descaling the PowerSteamer – Preventing Mineral Buildup
Over time, mineral deposits from tap water can accumulate inside your Bissell PowerSteamer PowerBrush, reducing steam output and potentially damaging the unit. Descaling regularly – typically every 30-60 days, depending on water hardness – is essential for optimal performance. Utilize the Bissell Descaling Solution, following the product’s instructions carefully, or a mixture of equal parts white vinegar and distilled water.
Pour the descaling solution into the water tank and run the steamer on a steam setting until the tank is empty. Allow the solution to sit within the unit for approximately 30 minutes to effectively dissolve mineral buildup. Afterwards, run two full tanks of clean, distilled water through the system to thoroughly rinse away any remaining descaling solution.
Consistent descaling ensures your PowerSteamer continues to deliver powerful, consistent steam for effective cleaning and extends the lifespan of your appliance.
Cleaning the PowerBrush Rollers & Attachments
Maintaining clean PowerBrush rollers and attachments is crucial for effective dirt and grime removal. After each use, or more frequently with heavy soiling, unplug the PowerSteamer and allow all components to cool completely. Carefully remove the PowerBrush roller and detach any other used attachments.
Inspect the roller for tangled hair, threads, or debris. Use scissors or a seam ripper to carefully remove these obstructions, avoiding damage to the bristles. Wash the roller and attachments with warm, soapy water, ensuring all residue is rinsed away. Allow them to air dry completely before reattaching.
Periodically inspect the attachment points for buildup and clean with a damp cloth. Regularly cleaning these components ensures optimal suction and scrubbing action, maximizing your PowerSteamer’s cleaning power.
Advanced Features & Accessories
Explore the Bissell PowerSteamer’s versatility with extension wands, specialized cleaning solutions, and diverse hose/nozzle attachments for comprehensive cleaning.
Using the Extension Wand
The Bissell PowerSteamer PowerBrush extension wand significantly expands your reach, allowing you to effortlessly clean elevated surfaces and hard-to-access areas without straining or bending. To attach the wand, securely connect it to the main handle of the PowerSteamer, ensuring a firm click to prevent detachment during operation.
When utilizing the extension wand, remember that the added length may slightly reduce steam pressure. For optimal results, maintain a consistent and moderate pace while gliding the wand across the surface. This tool is particularly effective for cleaning curtains, upholstery, and reaching under furniture. Always test a small, inconspicuous area first to ensure compatibility with the material.
Detach the wand by pressing the release button, located near the connection point, and gently pulling it away from the handle. Store the wand in a safe, dry place when not in use to prevent damage.
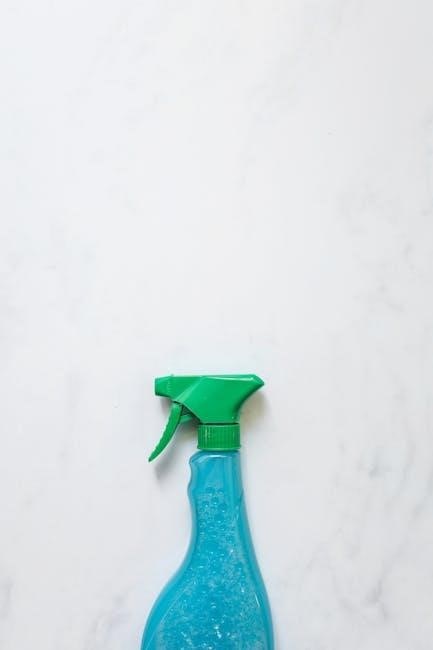
Specialized Cleaning Solutions – Bissell Formulas
Bissell offers a range of specialized cleaning solutions formulated specifically for use with your PowerSteamer PowerBrush, enhancing its cleaning power and protecting your machine. While distilled water is suitable for basic steaming, Bissell formulas tackle specific messes more effectively. Consider the Multi-Surface Floor Cleaner for tile, laminate, and sealed wood floors, lifting dirt and grime without leaving residue.
For carpets and rugs, Bissell’s Carpet Cleaning Formula deep cleans fibers, removing embedded stains and odors. Upholstery formulas gently yet powerfully clean sofas, chairs, and other fabrics. Always follow the dilution instructions on the solution bottle to avoid damaging your PowerSteamer or the surfaces you’re cleaning.
Using non-Bissell formulas may void your warranty and potentially harm the internal components of your machine. Choose the right formula for the best results!
Understanding the Hose & Nozzle Attachments
Your Bissell PowerSteamer PowerBrush includes a versatile hose and a selection of nozzle attachments, expanding its cleaning capabilities beyond floor surfaces. The hose allows for extended reach, perfect for cleaning stairs, upholstery, and tight spaces. Different nozzles target specific cleaning needs.
The standard nozzle is ideal for general-purpose cleaning, while the crevice tool focuses steam into narrow gaps and edges. A brush attachment gently scrubs surfaces, loosening stubborn dirt. Some models include an upholstery tool with a glide for delicate fabrics.

Proper attachment is crucial for optimal performance; ensure a secure connection to prevent steam leakage. Regularly inspect the hose for cracks or damage, and clean the nozzles to maintain consistent steam flow. Utilizing these attachments unlocks the full potential of your PowerSteamer.

Troubleshooting Common Issues
Addressing problems like heating failures, weak steam, or a non-rotating brush ensures your Bissell PowerSteamer PowerBrush operates efficiently and effectively cleans surfaces.
PowerSteamer Not Heating Up
If your Bissell PowerSteamer PowerBrush fails to heat up, several factors could be at play. First, verify the unit is securely plugged into a functioning electrical outlet; test the outlet with another device to confirm power delivery. Next, check the water tank – the PowerSteamer won’t heat if the tank is empty or not properly seated.
Ensure the power switch is firmly in the ‘On’ position. A tripped circuit breaker or blown fuse can also prevent heating; reset the breaker or replace the fuse as needed. Inspect the power cord for any visible damage, such as cuts or fraying, and discontinue use if damage is found.

If the issue persists, a potential internal component failure might be the cause, requiring professional service or repair. Always unplug the unit before attempting any troubleshooting steps to avoid electrical shock.
Steam Output is Weak or Non-Existent
Experiencing weak or no steam from your Bissell PowerSteamer PowerBrush often points to a few common issues. Begin by confirming the water tank is adequately filled with the appropriate water type – distilled or filtered water is recommended to prevent mineral buildup. Ensure the tank is correctly inserted and sealed, as a loose fit can hinder steam production.
Check for clogs in the steam nozzle or hose. Mineral deposits can accumulate over time, restricting steam flow. Descaling the unit regularly, as outlined in the maintenance section, is crucial. Verify the trigger is fully depressed during operation.
If the problem continues, a blockage within the internal heating system might exist, necessitating professional repair. Always unplug the device before inspecting or cleaning any components.
PowerBrush Roller Not Rotating
If the PowerBrush roller isn’t rotating during operation, several factors could be at play. First, ensure the unit is powered on and set to a cleaning mode that activates the brush. Inspect the roller itself for tangled debris – hair, threads, or larger particles can obstruct its movement. Carefully remove any obstructions using scissors or a seam ripper, being cautious not to damage the bristles.
Check the roller’s connection points to the motor; ensure it’s securely attached. A worn or broken drive belt could also be the culprit, requiring replacement. Listen for unusual noises from the motor, which might indicate a mechanical failure.
If these steps don’t resolve the issue, professional servicing may be needed to diagnose and repair the motor or internal mechanisms.

Warranty Information & Customer Support
Bissell provides warranty details for the PowerSteamer PowerBrush, alongside accessible customer service options and resources for locating replacement parts and accessories.
Bissell Warranty Details
Bissell stands behind the quality of its PowerSteamer PowerBrush with a limited warranty, protecting against defects in materials and workmanship from the original purchase date. The specific duration of the warranty can vary depending on the model and region, so it’s crucial to retain your proof of purchase – the original receipt – to validate coverage.
Typically, the warranty covers functional parts and labor for repair or replacement, at Bissell’s discretion. However, it generally does not cover issues arising from misuse, abuse, neglect, unauthorized repairs, or normal wear and tear. Damage caused by using anything other than Bissell-approved cleaning solutions may also void the warranty.
To initiate a warranty claim, customers should first contact Bissell Customer Service (details provided in the following section). Be prepared to provide your model number, serial number (if applicable), and a detailed description of the issue. Bissell will guide you through the necessary steps, which may include troubleshooting or arranging for repair or replacement.
Contacting Bissell Customer Service
For assistance with your Bissell PowerSteamer PowerBrush, or to initiate a warranty claim, Bissell offers multiple convenient channels for contacting their customer service team. The most direct method is often a phone call; check the official Bissell website (www.bissell.com) for the most up-to-date phone number specific to your region.
Alternatively, Bissell provides robust online support through their website, including a comprehensive FAQ section, troubleshooting guides, and downloadable manuals – like the one sourced from manualsbase. You can also submit inquiries through their online contact form or utilize their live chat feature for immediate assistance.
Social media channels, such as Facebook and Twitter, are also monitored by Bissell’s customer support team, offering another avenue for reaching out. When contacting support, have your model number and purchase date readily available to expedite the process.
Finding Replacement Parts & Accessories
Maintaining your Bissell PowerSteamer PowerBrush often requires replacing worn parts or acquiring additional accessories to enhance its cleaning capabilities; Bissell offers a dedicated online store (available through their website, www.bissell.com) where you can directly purchase genuine replacement parts, including rollers, brushes, hoses, nozzles, and water tank components.
Alternatively, many authorized retailers that sell Bissell products also stock common replacement parts. When ordering, always verify the part number to ensure compatibility with your specific model – the 1622 or similar. Resources like manualsbase can help identify the correct part numbers.
Bissell also sells specialized cleaning solutions and additional attachments designed to optimize performance on various surfaces. Regularly checking the Bissell website for promotions and bundles can offer cost savings.